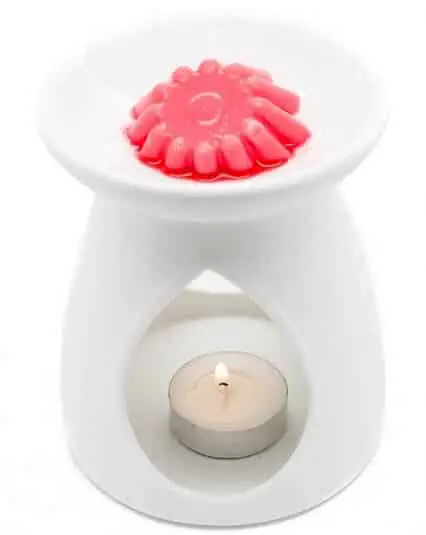
If you use wax melts and a wax warmer, you know how frustrating it can be when the wax hardens and becomes difficult to remove.
But don’t worry – there are a few simple steps you can follow to easily remove the hard wax from your wax warmer.
In this blog post, I’ll explain exactly how you can get your warmer back to looking as good as new!
I’ll also provide some additional tips for keeping your wax warmer clean and general maintenance.
How to Remove Hard Wax from a Wax Warmer in The Freezer
One of the easiest and most effective methods for removing hard wax from a wax warmer is to put the wax warmer in the freezer for 15 minutes or so.
This will cause the wax to harden, making it easier to chip off. Here’s how to do it:
- Unplug the wax warmer and allow it to cool completely. You don’t want to risk burning yourself when handling the hot wax, so make sure the wax warmer is cool to the touch before proceeding!
- Place the wax warmer in the freezer. You don’t need to wrap it or cover it – simply place it in the freezer as is.
- Let the wax warmer sit in the freezer for 15 minutes or longer if needed. The longer you let it sit, the harder the wax will become. You may need to leave it in the freezer for 30 minutes or more depending on the size of the wax warmer and the temperature of your freezer.
- Remove the wax warmer from the freezer and gently tap the wax to loosen or dislodge it. You may need to use a spoon or butter knife to gently pry the wax off the sides of the warmer.
- Wipe the wax warmer clean. Once you’ve removed all the wax, use a soft cloth or paper towels and a little baby oil to wipe the wax warmer clean.
How to Remove Hard Wax from a Wax Warmer with Cleaning Products
If you don’t want to/can’t use the freezer method, you can also try using a combination of hot water and soap or cleaning products to remove the wax.
You can start by filling the wax warmer with hot water and a squirt of dish soap, letting it sit for a few minutes, and then using a spoon or butter knife to gently scrape the wax off the sides of the warmer.
If soap doesn’t work, you need to use something a little more abrasive that is safe to use with your burner.
There are some cleaning products on the market specially formulated to be used on wax warmers, so check your local store for one of these products.
Otherwise, you can use a combination of vinegar and baking soda to create a paste that will help loosen the wax.
Dampen a paper towel or cloth with warm water and then apply the paste to the wax.
Let it sit for a few minutes and then gently scrape off the wax.
Rinse the wax warmer with warm water, then dry it with a soft cloth or paper towels.
Related posts:
Here is why you can’t put Unstoppables in your wax warmer;
How to use fragrance oils in your wax warmer;
Tips for keeping your wax warmer clean and stopping hard wax buildup
The best cure for hard wax on your burner is prevention!
Here are some tips to help you maintain your wax warmer and avoid those pesky, stubborn wax stains:
- Clean up any spills or drips immediately. If you notice that wax has spilled or dripped onto the outside of your wax warmer, wipe it up as soon as possible to prevent it from hardening and becoming more difficult to remove.
- Use a paper towel or cloth to wipe the inside of the wax warmer after each use. This will help remove any excess wax and keep the inside of the warmer clean.
- Allow the wax to cool completely before removing it from the wax warmer. If the wax is still hot, it will be more difficult to remove and may create a mess.
- Use a cotton swab or toothbrush to clean small crevices or corners. If you have a hard time getting wax out of small corners or crevices, use a cotton swab or toothbrush to gently scrub them clean.
- Use hot water and soap to remove stubborn wax. If you’re having trouble removing hard wax from your wax warmer, try filling the warmer with hot water and a squirt of dish soap. Let it sit for a few minutes, then use a spoon or butter knife to gently scrape the wax off the sides of the warmer.
By following these maintenance tips, you can keep your wax warmer clean and in good working condition for longer and avoid giving yourself the task of deeper cleans!
Image credits – Image by Kevin Partner from Pixabay

I’m a MA, (CMT) Certified Massage Therapist, Licensed Massage Therapist (LMT), and Reiki Master — I’m a licensed massage therapist with over 10 years of experience in the industry.

